|
|
Post by Steve-o on Jul 31, 2012 9:03:28 GMT -5
WoW !! 
I am just blown away by this !! 
Lost for words here !! ;D ;D
Fantastic !!!!  
|
|
johnj
Full Member
  
Posts: 178
|
Post by johnj on Aug 1, 2012 8:01:15 GMT -5
Hey guys, gonna be a couple of weeks before I can get anymore done on this. We closed on our new house yesterday and all my time will be used up moving for a while. I'll finish this ASAP. John
|
|
|
|
Post by Bill (admin) on Aug 1, 2012 11:17:36 GMT -5
Life first... Models second!
Man that was tough to say!
|
|
|
|
Post by rustyrat1960 on Aug 2, 2012 19:13:48 GMT -5
;D John Glad to hear things are positive for you!! We will be here "waiting" anxiously for your return!! Take care of the important so as to concentrate on the pleasures!! Thank You Later Russ  i love this build!! i love this build!! |
|
johnj
Full Member
  
Posts: 178
|
Post by johnj on Aug 24, 2012 11:00:32 GMT -5
I'm back!! The move has been made, but I can't really say we live here yet. It's more like we sleep here. Boxes and other junk everywhere you look. I'm getting bids on finishing the basement, including the new model room. In the meantime I thought I would post some photos of the details I scratchbuilt for the Texaco Station. Details are what make a diorama. Without them it just doesn't come to life. Unfortunately, in this case I never had an intention of doing a tutorial so there are no construction photos. I will try to describe what was done and if there are any questions I will do some more work and get photos this time. First is a period Coca Cola cooler. 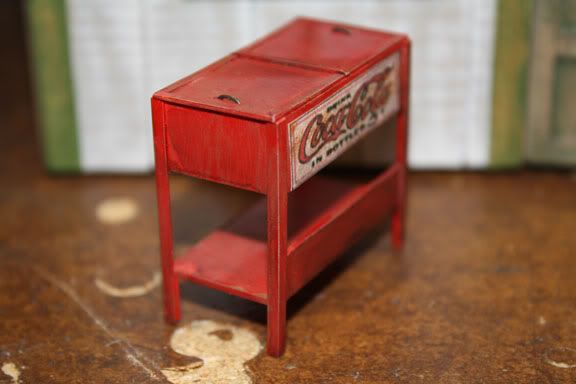 |
|
johnj
Full Member
  
Posts: 178
|
Post by johnj on Aug 24, 2012 11:10:00 GMT -5
Sorry about that, accidentally posted when I meant to preview. Here are a couple more photos of the cooler. 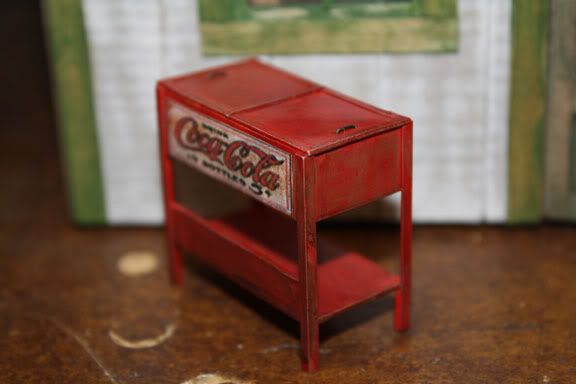 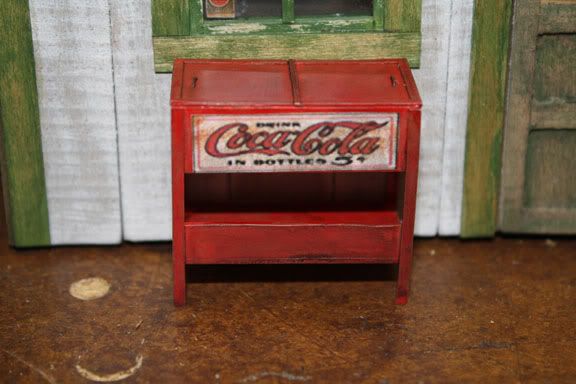 The cooler is made out of styrene sheet .20 thick. The legs are angle rod. The top of the cooler is also solid sheet with a piece of flat styrene glued in place to replicate the hinge. The handles are soft wire bent to shape and inserted in holes drilled in the top. Coca Cola has used many shades of red over the years so I just picked one that looked appropriate and sprayed the cooler. The Coca Cola logo is from the internet. It was sized in photoshop and then applied with a mixture of white glue and water. The cooler was then aged with a couple of homemade washes and some homemade rust was lightly applied. The whole thing was then sealed with a flat clear. I think the final product is a relatively convincing replica of a 1930s Coke cooler. Tomorrow we will take a look at the workbenches. |
|
|
|
Post by Bill (admin) on Aug 24, 2012 18:05:56 GMT -5
That piece is a nice touch John!
Great to see ya back!
Bill
|
|
|
|
Post by rustyrat1960 on Aug 24, 2012 21:40:33 GMT -5
 Yeah! this is an easy piece of eye candy for sure!! I love it!! Thank You for sharing Later Russ 
|
|
|
|
Post by Chuck D. on Aug 25, 2012 18:25:57 GMT -5
I'm dumbfounded .. this is nothing short of a masterpiece .. I can't stop drooling on my keyboard .. 
|
|
johnj
Full Member
  
Posts: 178
|
Post by johnj on Aug 25, 2012 22:42:52 GMT -5
The diorama has two work benches. Both were scratchbuilt out of bass wood cut on my bandsaw. They are stained with two different alcohol/ink stains. The items on the benches were found in a G scale detail kit I found at a local model railroad show. Remember G scale is pretty much the same size as 1:24. 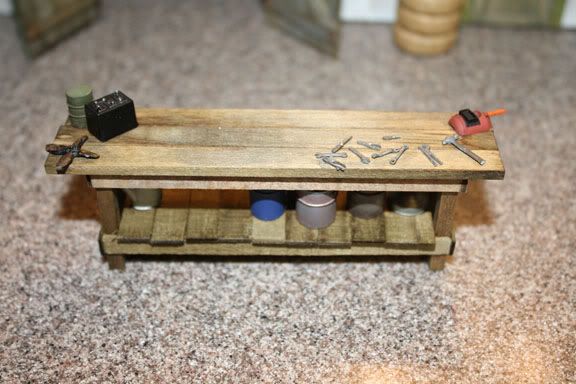 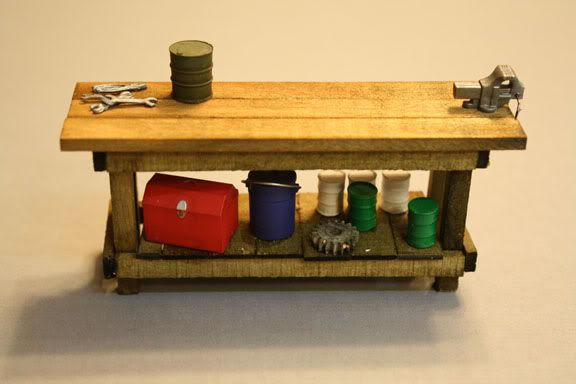 This is the second bench in place inside the garage. I wanted you to see the oil cases next to it. This is one of those details that are really simple and very effective. The cases are simply a piece of bass wood crapped with computer generated labels. Went together in a matter of minutes.  This is one of the G scale sets. As you can see much of it is not period correct for this build, but they will come in handy at some time in the future.  Another thing to watch for is a G scale or 1:24 drums. They have many uses as diorama details. 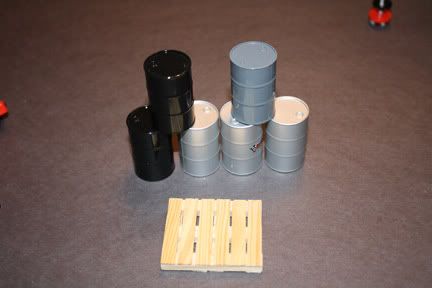 When aged they can become trash cans, bulk kerosene tanks, burn barrels, etc. The main thing to remember with details is there can never be too many. That's it for this thread. I hope you have enjoyed it. I'm currently doing the drawings for another gas station. This time it will be a historic station located in American Fork, Utah. Over the next few months I will post the construction thread. |
|
johnj
Full Member
  
Posts: 178
|
Post by johnj on Aug 26, 2012 15:33:30 GMT -5
Good move Bill. This is a more appropriate spot.
Now, let's see the dioramas of other guys. I know there is a lot of talent on this board and I'm sure some of you have done dioramas.
|
|
|
|
Post by Bill (admin) on Aug 26, 2012 16:32:00 GMT -5
HOLY SCHMIDT Fellas.... We've been called out! ;D ;D ;D
Big John J. has put a forth a "H" of an effort here guys, I think
we owe him a responce.
|
|
|
|
Post by Steve-o on Aug 27, 2012 9:09:37 GMT -5
Yes i agree with Bill .
Sorry for the delay John
I am truly blown away by your craftsmanship !!  
Every thing looks fantastic . I really appreciate you showing us all the step by steps This should definitely inspire others.
I may even try to give it a shot myself some day !! ;D ;D
Thanks for taking the time & showing us your work.
|
|
|
|
Post by Chuck D. on Sept 7, 2012 12:28:49 GMT -5
Wow .. talk about inspiration. I am speechless here .. there's detail and THEN there's DETAIL .. plus your photography is impeccable !!.. this is a museum piece not "just" a diorama ...you have my full attention sir .. 
|
|
|
|
Post by rustyrat1960 on Feb 16, 2013 17:06:42 GMT -5
 OH BOY!! AM I A FORGETFUL KNOT HEAD!!  I am digging out my pile of balsa wood John!! Thank You for this!! Oh Wow!  Later Russ 
|
|


